Translate
Tuesday, 11 May 2021
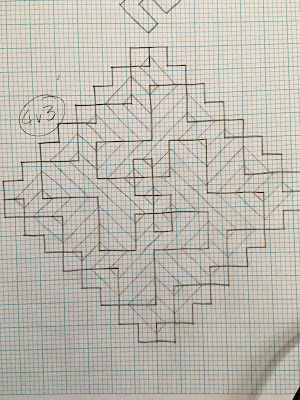
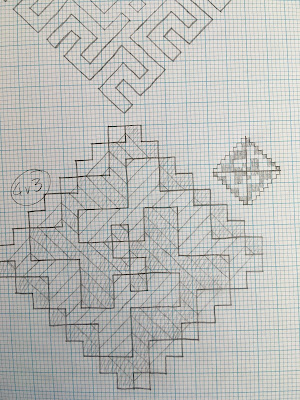
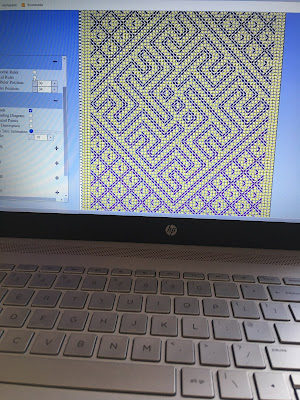
My Design Process for Large Drafts
Friday, 7 May 2021
Exciting Book News!
Wednesday, 7 April 2021
Petre
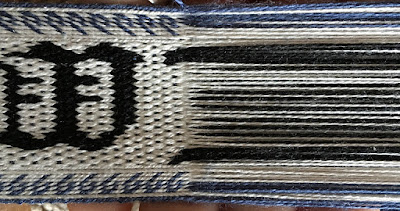
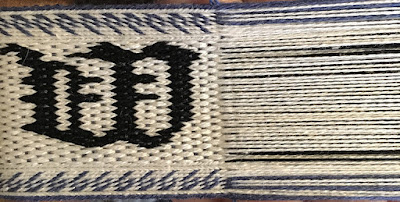
This draft is based on a German brick-stitch pattern from the Hildesheim Cope (accession number: 17-1873), specifically the section that deals with the martyring of Saint Peter (spelled "Petre" in Latin). I've been fascinated by the Cope since I first saw it in the summer of 2016, on display in Medieval and Renaissance Room 9 at the Victoria and Albert Museum in London. It's a large embroidered semi-circular vestment, dated to the 12th century, adorned by a number of tablet woven brocaded bands. I discuss the motifs of these bands in more detail in my book Tablet Weaving in Theory and Practice: Vacant-Hole Pinwheels.
I decided to design this draft as vacant-hole (one or more holes of the tablets are left intentionally empty), but to set up the tablet threading so that all the tablets would turn together in the same direction to make a quick and simple weave. This makes it an excellent first band if you've never tried the technique before.
When I was weaving the sample, I flipped the threading direction of the selvedge tablets (tablets 1, 2, 3, 36, 37 and 38) so that I could turn them together with the pattern tablets. When you flip a tablet, then turn it in the opposite direction, its threads will continue to twine in the same way as before. A Z-threaded turned backwards will produce the same result as an S-threaded tablet turned forwards.
If you take a break during weaving this draft, be sure to secure the tablets with an elastic band or by tying a cord around them (or what ever method you prefer) as they may re-orient themselves so that the vacant-hole is either at the top or bottom of the pack.
The vacant holes of the tablets are represented by empty squares in the draft below and by the word "Empty" in the text version of the draft. The sample was woven using a white weft, flecks of which can be seen on the surface of the band, where they would normally have been covered if the vacant holes of the tablets were filled. If you'd prefer, the draft's turning sequence will be the same if the vacant holes of the tablets are filled. If you do this, I suggest picking a thread that is the same as your background colour and using a weft that's the same colour as the lines for your motifs.
You can download the TDD file for this draft by clicking here.
The text version of this draft is as follows:
- Threading:
- S threaded tablet
- White (#ffffff)
- White (#ffffff)
- White (#ffffff)
- White (#ffffff)
- Z threaded tablet
- Red (#ff0000)
- Red (#ff0000)
- Red (#ff0000)
- Red (#ff0000)
- S threaded tablet
- White (#ffffff)
- White (#ffffff)
- White (#ffffff)
- White (#ffffff)
- Z threaded tablet
- Red (#ff0000)
- White (#ffffff)
- Empty
- White (#ffffff)
- Z threaded tablet
- White (#ffffff)
- Red (#ff0000)
- White (#ffffff)
- Empty
- Z threaded tablet
- Empty
- White (#ffffff)
- Red (#ff0000)
- White (#ffffff)
- Z threaded tablet
- White (#ffffff)
- Empty
- White (#ffffff)
- Red (#ff0000)
- S threaded tablet
- White (#ffffff)
- Empty
- White (#ffffff)
- Red (#ff0000)
- S threaded tablet
- Empty
- White (#ffffff)
- Red (#ff0000)
- White (#ffffff)
- S threaded tablet
- White (#ffffff)
- Red (#ff0000)
- White (#ffffff)
- Empty
- S threaded tablet
- Red (#ff0000)
- White (#ffffff)
- Empty
- White (#ffffff)
- Z threaded tablet
- Red (#ff0000)
- White (#ffffff)
- Empty
- White (#ffffff)
- Z threaded tablet
- White (#ffffff)
- Red (#ff0000)
- White (#ffffff)
- Empty
- Z threaded tablet
- Empty
- White (#ffffff)
- Red (#ff0000)
- White (#ffffff)
- Z threaded tablet
- White (#ffffff)
- Empty
- White (#ffffff)
- Red (#ff0000)
- S threaded tablet
- White (#ffffff)
- Empty
- White (#ffffff)
- Red (#ff0000)
- S threaded tablet
- Empty
- White (#ffffff)
- Red (#ff0000)
- White (#ffffff)
- S threaded tablet
- White (#ffffff)
- Red (#ff0000)
- White (#ffffff)
- Empty
- S threaded tablet
- Red (#ff0000)
- White (#ffffff)
- Empty
- White (#ffffff)
- S threaded tablet
- White (#ffffff)
- Empty
- White (#ffffff)
- Red (#ff0000)
- S threaded tablet
- Empty
- White (#ffffff)
- Red (#ff0000)
- White (#ffffff)
- S threaded tablet
- White (#ffffff)
- Red (#ff0000)
- White (#ffffff)
- Empty
- S threaded tablet
- Red (#ff0000)
- White (#ffffff)
- Empty
- White (#ffffff)
- Z threaded tablet
- Red (#ff0000)
- White (#ffffff)
- Empty
- White (#ffffff)
- Z threaded tablet
- White (#ffffff)
- Red (#ff0000)
- White (#ffffff)
- Empty
- Z threaded tablet
- Empty
- White (#ffffff)
- Red (#ff0000)
- White (#ffffff)
- Z threaded tablet
- White (#ffffff)
- Empty
- White (#ffffff)
- Red (#ff0000)
- S threaded tablet
- White (#ffffff)
- Empty
- White (#ffffff)
- Red (#ff0000)
- S threaded tablet
- Empty
- White (#ffffff)
- Red (#ff0000)
- White (#ffffff)
- S threaded tablet
- White (#ffffff)
- Red (#ff0000)
- White (#ffffff)
- Empty
- S threaded tablet
- Red (#ff0000)
- White (#ffffff)
- Empty
- White (#ffffff)
- Z threaded tablet
- Red (#ff0000)
- White (#ffffff)
- Empty
- White (#ffffff)
- Z threaded tablet
- White (#ffffff)
- Red (#ff0000)
- White (#ffffff)
- Empty
- Z threaded tablet
- Empty
- White (#ffffff)
- Red (#ff0000)
- White (#ffffff)
- Z threaded tablet
- White (#ffffff)
- Empty
- White (#ffffff)
- Red (#ff0000)
- S threaded tablet
- White (#ffffff)
- White (#ffffff)
- White (#ffffff)
- White (#ffffff)
- Z threaded tablet
- Red (#ff0000)
- Red (#ff0000)
- Red (#ff0000)
- Red (#ff0000)
- S threaded tablet
- White (#ffffff)
- White (#ffffff)
- White (#ffffff)
- White (#ffffff)
- Turning:
- 38F
- 38F
- 38F
- 38F
- 3F 32B 3F
- 3F 32B 3F
- 3F 32B 3F
- 3F 32B 3F
- 38F
- 38F
- 38F
- 38F
- 3F 32B 3F
- 3F 32B 3F
- 3F 32B 3F
- 3F 32B 3F
- 3F 32B 3F
- 3F 32B 3F
- 3F 32B 3F
- 3F 32B 3F
- 38F
- 38F
- 38F
- 38F
- 3F 32B 3F
- 3F 32B 3F
- 3F 32B 3F
- 3F 32B 3F
- 38F
- 38F
- 38F
- 38F
Friday, 2 April 2021
Threading Errors Video
Friday, 26 March 2021
Knitting Patterns
Aesculus Shawl
Hugs by Post Shawl
Lace Draw-String Bag
Needle Roll
Sunday, 21 March 2021
Yarns I Like for Tablet Weaving
Recently, I wrote about and made a video about the criteria I use when I'm selecting yarn for tablet weaving. In this post, I thought I'd tell you about some of the yarn that I like using myself. I'm not sponsored by any of the companies I mention and everything I say here is my personal opinion.
When I weave rigid heddle and tablet woven bands for the sale box I take to events with me (in non-plague years!), I mostly use Drops Karisma DK. It's 100% wool, 100m/50g and comes in a good range of colours. It's also pretty economical, especially if you buy it during one of the Drops discount events that happen several times a year.
I like to use King Cole Merino Blend 4-ply when I'm weaving trim. It's 100% superwash wool (meaning that it's machine washable)and 180m/50g. It's the yarn I used when I wove the samples for Noughts and Crosses and Tic Tac Toe and makes a lovely trim, as it makes bands that weave up fairly fast, but are less bulky when stitched to a garment than DK.
For the samples I make for my books, I like World of Wool Weaving Yarns, although at the time of writing, it has been discontinued. It's 100% wool and 8000m/1000g and came in black, white and orange. To extend the range of colours, I've been using the white yarn for natural dyeing. For one of the samples for my book Tablet Weaving in Theory and Practice: Double-Face Inscriptions, I used Brazilwood dye and an alum mordant from George Weil to get the lovely red colour that I needed.
Lastly, Piper's Silks. For very special bands, I use their 80/3 spun silk, which is 75m per spool. It's beautifully smooth and because of its tight twist, it stands up to tablet weaving really well. It's pretty fine, so when I use it to make a belt, I laminate together several layers of buckram, then sandwich that between the band and cotton twill tape and stitch them together. This yarn comes in a great range of vibrant colours and the woman who runs the company is an absolute pleasure to work with.
Saturday, 13 March 2021
Choosing Yarn for Tablet Weaving
I've made a new video and added it to the beginning of the tutorial page here. It's all about the things I consider when choosing yarn for a new band.
Saturday, 27 February 2021
Correcting Errors Video!
I found that I really enjoyed making a video about using TDD last week, so I thought I'd make another! This time it's about the technique I use for stripping out weft when I want to reweave a large section of a band. I've added it to the top of the page I've made for it here on my blog, too.
I have several more videos I'm planning to make and I hope to sort out a set up at some point so that you can actually see me weave. There's a semi-continuous warping technique that I've been wanting to share with you for a long time.
Friday, 26 February 2021
Correcting Errors
If you are unhappy with your band or you want to correct a mistake, you can turn the tablets in the opposite direction to the way you turned them during weaving to unweave your work, taking the weft out of the shed as you go. If you need to go back more than a few picks, you might want to consider stripping out the weft to make this process easier.
Pull the warp threads apart to the side, towards the selvedges to expose the weft.
Snip it with a pair of scissors (being very careful not to nick any warps!) to a point a few picks above where you want to restart your band.
Pull out each piece of weft with your fingers or a pair of tweezers.
Turn the tablets until the twist is gone between them and the final piece of weft in the shed just above where you plan to restart.
Unweave the final few picks by turning the tablets in the opposite direction to the way you turned them when you wove that section. Carefully remove the weft from the shed each time it is exposed and the shed is open. This will give you a short section of weft attached to the band.
Join a new weft by placing it into the shed with a short tail sticking out of the band, then turn the tablets according to your draft and place the old weft tail through the shed alongside the new weft to lock it in place. Weave with the new weft and the old weft tail in the shed together for a pick or two, then continue on with only the new weft. Trim away the tails of the new and old wefts to neaten up the band.
Sunday, 21 February 2021
Tablet Weaving Draft Designer Updates
We've been wearing our bug squishing boots again!
This weekend we've:
- Fixed an error that caused the horizontal ruler to sit behind the threading diagram, rather than on top of it
- Sorted a few spelling errors
- Updated the copyright notice to read 2015-2021
- Changed the instructions link to point to a new version
- Fixed a bug causing canvas size change problems when the rulers would be off the edge of a new draft

